
2016
pm
Tips for Saving Your Water Damaged Photos Written by: Cora Foley
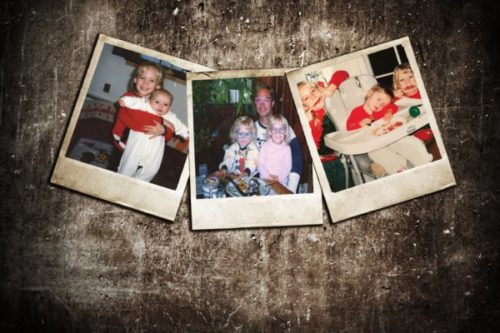
Water can be detrimental to your analog memories. Photos, videotapes, films, etc. can’t easily stand up to the effects of water. On a small scale, maybe a drink gets spilled on a stack of photos and is now drenched. On a larger scale, a pipe may burst or a rainstorm may flood your basement causing all of your cherished childhood memories to become completely soaked. Water damage can occur in so many instances and most of the time without warning.
Of course, the best way to guarantee that your memories are safe (even if the originals get destroyed) is by having Smooth Photo Scanning Services convert all of your favorite memories to digital files. Regardless of whether or not you’ve digitized your family memorabilia yet, we thought it would be helpful to learn how to salvage those one-of-a-kind photographs in the event that they become soaked in water.
If your photos are already dry and the water damage has been done, your best option may be our Photo Restoration Services.
IF YOU FIND WATER DAMAGED PHOTOS RIGHT AWAY:
- Remove Items From Dirty Water: Very carefully, lift photos out of the water. Make sure not to touch the emulsion layer (light sensitive chemical layer where the image is). Separate any stacks of wet photos slowly and carefully remove any photos from wet albums.
- Rinse Photos: Gently rinse off any dirt or particles that may have gotten on the photographs with cold water.
- Lay Photos Flat to Dry: In a dry, air conditioned room place photos image side up on an absorbent surface such as a cloth or paper towels. Make sure there is no coloring on the towel to ensure that dye doesn’t transfer onto the wet photos. Make sure photos are in a single layer. As the photos dry they will become sticky and if the images are touching at all they will stick together causing more damage. Change the cloth or paper towels every hour or so, if time permits, until dry.
IF YOU FIND THE WATER DAMAGED PHOTOS RIGHT AWAY AND DON’T HAVE TIME TO DEAL WITH IT IMMEDIATELY:
- Remove Items From Dirty Water: Very carefully, lift photos out of the water. Make sure not to touch the emulsion layer (light-sensitive chemical layer where the image is). Separate any stacks of wet photos slowly and carefully remove any photos from wet albums.
- Rinse Photos: Gently rinse off any dirt or particles, with cold water, that may have gotten on the photographs.
- Stack Photos & Freeze Them: Stack photos with a layer of wax paper between each photo if possible. Put the stack of photos in a zip lock bag and place in a frost free freezer. This should preserve your photos for up to a few months; however, you should handle them as quickly as possible.
- Thaw Your Photos: When you are ready to dry your photos take them out of the freezer and allow them to slowly thaw in a cool, dry environment for 24-48 hours.
- Lay Photos Flat to Dry: In a dry, air conditioned room place photos image side up on an absorbent surface such as a cloth or paper towels. Make sure there is no coloring on the towel to ensure that dye doesn’t transfer onto the wet photos. Make sure photos are in a single layer. As the photos dry they will become sticky and if the images are touching at all they will stick together causing more damage. Change the cloth or paper towels every hour or so, if time permits, until dry.
HOW TO DRY OUT THE WET PHOTOS
Once you discover that the photos have been damaged, the most urgent step you need to take is drying them out to minimize the damage and prevent it from spreading. Where there’s moisture, there’s always a chance of mold, so drying the photos as soon as possible is absolutely crucial.
However, even though you need to act quickly, it’s also essential to not rush the process, as it could cause severe and irreversible damage that could be avoided with some patience.
For instance, if the photos that were wet are stuck together, under no circumstances should you try and force them apart. That will almost always lead to damage that won’t be possible to repair, no matter what techniques you use.
Sometimes, you will need to soak the pictures in distilled water to get them unstuck from one another. Still, if you’re unsure, it’s better to consult a professional who can advise on the best course of action in any given situation.
When handling wet photographs, you should also be careful not to touch the surface with your fingers as that can leave stains or transfer debris. Instead, wear gloves and try to handle the photographs by their very edges.
Once you’ve lined up all of the photos that have been affected, use a dry paper towel and place it above the pictures, allowing it to absorb the moisture. Remember to replace it every few hours until the photos are completely dry.
You should also create airflow in the room either with a fan or with a draft, as that will help them dry quicker and prevent a humid environment.
HOW TO REPAIR WATER DAMAGED PHOTOS
Now that you’ve prevented the damage from getting worse and have dried out your photo collection, it’s time to consider the options that you have for fixing the situation.
-> DO IT YOURSELF
The first idea many people get when thinking of ways to restore their damaged photos is trying to figure out how to do it on their own.
However, while it is certainly possible, there are plenty of challenges that you will need to consider.
As you probably understand, repairing the physical copies of the images is impossible, so you will either need to convert the negatives to digital if you have them or scan the photos themselves and then use software solutions to fix them.
But how can you scan your photos?
Well, you could try using your regular scanner, but that wouldn’t produce results you would be happy with. In fact, it might be better to use a high-definition DSLR camera, but that isn’t ideal either.
But if you want to do it on your own, you will probably need to use one of the above options, as buying specialized scanning equipment would set you back thousands of dollars.
Once you get the photos scanned, you will need to choose a software tool that you’ll need to bring the images back to life.
One important thing to consider is that while there are plenty of free or cheap solutions, most of them are very limited and will only allow you to make the simplest of revisions. Meanwhile, if you go for a pro-level software tool like Photoshop, you will not only have to spend a lot of money but will also have to spend countless hours mastering it before you can change your damaged photos for the better.
That’s why, in most cases, it makes much more sense to use a bulk photo scanning service that can guide you through the entire process. Let’s explore the reasons why below.
-> HIRE PROFESSIONALS TO FIX WATER DAMAGED PHOTOS
Dealing with photos that have suffered water damage is a delicate process that requires many considerations, which is why unless you have extensive experience in the field, it’s always a good idea to seek out advice and help from someone who does.
If you go with a professional photo scanning service, they can provide guidance on how to dry out the photos safely, or whether you can simply convert negatives to digital images and avoid having to fix the imperfections.
Unlike when trying to do everything on your own, when leaving your damaged photos in the hands of experienced professionals, you can rest assured that they will use the newest and most advanced equipment to scan your photographs in the highest quality possible.
Then, professional photo editors will use software to bring the images back to life, providing you with digital versions that look clearer, sharper, and more beautiful than the originals ever did.
Once your collection is digitized, you will never again have to worry about where to store it and how to protect it from suffering damage again – all of your precious memories will be safely stored on your computer or the cloud, and you and the future generations will always be just a click away from accessing them.
CONCLUSION
As with many things in life, it is always smart to be prepared for the worst. The worst-case scenario is that you lose all of your precious memories and family history forever. Hopefully, the above procedures will help prevent this from happening. Of course, the best way to protect your legacy from damage is to have your media digitized. We like to think of it as having memory insurance. Smooth Photo Scanning Services works tirelessly to make sure your legacy lives on long after you’re gone. Contact us today to get started!
Cora Foley has worked at Smooth Photo Scanning for almost 4 years now. Her passion for memory creation and preservation drew her to this family-owned company. After using Smooth Photo Scanning Services for her own memories, she wanted to help the company spread their reach so more people can enjoy, share and preserve their own experiences through digitized photos, negatives, video tapes and more. She loves working at this company due to their passion of preserving important moments!