Cleaning film negatives is essential to preserve precious photographic history. Use safe, gentle techniques like dust removal, distilled water rinses, isopropyl or archival film cleaners, and avoid harsh chemicals or excessive handling.
Store cleaned negatives in archival sleeves and stable environments. If you prefer, professional services like Smooth Photo Scanning can also help preserve and digitize your negatives.
Introduction
Sometimes, years later, you dig out a shoebox of film negatives and get a glimpse into a summer holiday, your first portrait shoot, or family moments long past.
You slide one into the light and see dust specks, smudges, or cloudy water stains marring the image. It’s painful to look at. What was once a fragile memory is now nearly lost to grime and decay. You know those negatives deserve better. You want them to shine again and preserve them for future generations. But one wrong move and you risk scratching or permanently damaging the emulsion.
Today, we will go through the steps on how to clean photo negatives in a safe, trustworthy way. After reading this, you’ll be able to restore clarity to your negatives while minimizing risk. And if you want expert help, Smooth Photo Scanning is right by your side.
Why Is Cleaning Film Negatives Important?
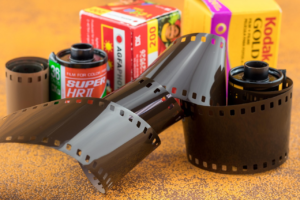
When people ask what are film negatives, they often imagine a simple strip of film. But negatives carry the full detail and tonality of your captured scene as they are the original record. Over time, mold, grime, dust, fingerprints, water spots, residue from processing, or airborne contaminants can collect on their surfaces. Here’s why cleaning matters:
- Better scans and prints: When you digitize or print, or smudge becomes a flaw. Cleaning improves image clarity and tonal fidelity.
- Preservation: Dirt, fingerprints, mold, and residue can catalyze chemical decay. Removing contaminants slows down the deterioration process and helps maintain the integrity of the negatives.
- Access and reusability: Cleaned negatives are easier to handle and scan. You can confidently use them in future projects or restoration work.
“I’ve heard of folks getting good results using 98%+ isopropyl alcohol and a soft anti-static cloth to wipe the negatives clean,” as noted by the Film Photography Project. When done properly, cleaning negatives helps turn them into lasting assets and not brittle relics.
What Do You Need to Clean Film Negatives?
Before you begin, gather these tools and materials. Having everything ready reduces handling mistakes.
| Item |
Purpose |
Notes |
| Lint-free cotton or nitrile gloves |
Prevent fingerprints and oil |
Always handle by the edges |
| Air blower/rocket blower |
To remove loose dust and particles |
Blow from both sides |
| Soft anti-static microfiber cloths or Pec Pads |
Gentle wiping |
Avoid rough fabrics |
| Distilled or deionized water |
For rinsing |
Tap water can leave mineral residues (“water stains”) |
| Isopropyl alcohol (≥ 98%) or archival film cleaning solution (e.g., Pec-12) |
For stubborn grime |
Use sparingly on the non-emulsion side |
| Photographic wetting agent (e.g., PhotoFlo diluted) |
Helps film drain streak-free |
Use a very diluted solution (e.g., 200:1) |
| Clean drying rack / dust-free space |
Let negatives dry vertically |
Use clips or hangers in a clean area |
| Magnifier or light panel |
To inspect damage & cleanliness |
Helps identify smudges and scratches |
| Archival sleeves and storage boxes |
For post-cleaning protection |
Use acid-free, PAT-tested materials |
Pro Tip:
Set up your workspace in a low-dust, well-lit area. Do not have fans blowing dust around while cleaning.
Step-By-Step: How Can You Clean Film Negatives Safely?
Here’s a step-by-step method for cleaning photo negatives that balances safety and effectiveness:
1. Prepare and inspect
- Wash and dry your hands or wear gloves.
- Handle each negative by its edges and never touch the image area.
- Lay the negative over a light panel or use a loupe to inspect for dust, smudges, scratches, or residue.
- Use the air blower to gently dislodge loose particles on both sides.
2. Dry cleaning pass
- Use a Pec Pad or a lint-free microfiber cloth to lightly sweep the surface. Always move from the center outward, avoiding circular scrubbing.
- If the negative feels dusty after this pass, blow again.
3. Wet cleaning if needed
Use with extra caution here, as wet cleaning carries risk. Only do this for negatives with smudges or residue that don’t respond to dry methods.
- Fill a clean tray with distilled water at room temperature.
- Optionally, add a very dilute wetting agent like 1 part PhotoFlo to 200 parts water.
- Submerge the negative gently, agitate for ~30 seconds to 1 minute.
- Remove and place on a drip rack vertically.
- Use a gentle isopropyl alcohol wipe or cleaning solution on the non-emulsion side only. Avoid contact with the emulsion unless necessary, as many experts emphasize the risk of damaging the emulsion.
- Rinse again in distilled water to flush any residual cleaning agent.
4. Drain & dry
- After rinsing, hold the negative vertically to drain.
- Use a wipe to gently remove excess droplets from edges. No matter what happens, do not drag across the image area.
- Hang or clip to dry in a dust-free environment. Avoid forced airflow or fans that stir dust.
5. Final inspection
- After drying, view under a light panel.
- If fine residue remains, you may repeat wet cleaning or spot-clean with a Pec Pad and alcohol on the outer region.
- Always scan or make a backup before further intervention, as sometimes, a digital retouch is safer than risking the negative.
Many photographers caution: “If the emulsion side of the negative comes back stained, we take the risk of ruining the photo.” So, use restraint and patience.
What Should You Avoid When Cleaning Film Negatives?
While cleaning negatives is beneficial, there are pitfalls. Here’s what to avoid:
- Never use tap water alone, as it can leave mineral deposits once dried.
- Avoid harsh solvents like acetone, harsh detergents, or strong acids, as they may dissolve binder layers.
- Don’t scrub or rub aggressively on the emulsion. That invites scratching or micro-abrasions.
- Don’t soak for long, as prolonged exposure softens the emulsion and may cause adhesion to surfaces.
- Never stack wet negatives as they can stick together.
- Avoid cleaning in dusty environments, as dust may scratch while you’re working.
- Do not flatten brittle or curl-prone negatives abruptly, as rewetting and supporting them is safer.
- Avoid repeated wet cleaning as frequent wetting accelerates aging.
- Don’t ignore deterioration because if negatives show signs of vinegar syndrome or delamination, seek professional conservation.
In short, always favor gentle, minimal intervention and avoid forcing anything.
How Do You Handle Stubborn Stains or Mold on Negatives?
Sometimes, a negative has more than dust: mold, fogging, fixer residue, dark spots, or tape marks. These require special care.
Stubborn residue, water spots, fixer stains
- Use a very mild solution of distilled water with a wetting agent and a single isopropyl wipe on the back side. Many negatives respond to that.
- Pec-12 or archival film cleaners are designed to dissolve film-based residues with minimal risk. Many restorers use it when isopropyl alone fails.
- If a stain penetrates the emulsion, consider rewashing the negative very gently and rescanning before proceeding.
Mold or fungus growth
- If mold is present, isolate the negative immediately. Mold can spread to other film or paper holdings.
- Try a gentle rewash with distilled water, followed by a mild cleaning solution. Some mold can be removed if caught early.
- For serious cases, where film is sticky, delaminating, or the mold has invaded the emulsion, seek a trained conservation professional. At that point, aggressive cleaning may cause irreversible damage.
Mold remediation is delicate, so don’t rush or experiment with unproven chemicals.
How Should You Store Cleaned Negatives?
Cleaning is only half the task. Proper storage makes sure your negatives stay safe for decades and makes it easier later if you want to use them for printing photographs from negatives.
Storage environment best practices
- Temperature & humidity control: Aim for 40 to 60 °F or 4 to 15 °C with 30 to 40% relative humidity. Avoid fluctuations.
- Avoid light & pollutants: Store negatives in dark, sealed cabinets or boxes. Use filtered air if possible.
- Layered protection: Use archival sleeves or folders like acid-free, lignin-free, PAT-tested, housed in archival boxes.
- Labeling & indexing: Use a system so you can retrieve desired negatives efficiently without overhandling.
- Avoid overcrowding: Leave room so negatives aren’t pressing against each other.
- Freeze or cold storage (optional): Some archives store film in freezer conditions to slow chemical decay, especially useful for cellulose acetate negatives. But thaw slowly in a dry environment to avoid condensation.
Pro Tip:
Use silica gel or moisture absorbers in your storage boxes and monitor them; change periodically to maintain dryness.
What Are the Key Takeaways for Cleaning Film Negatives?
You’ve learned how to clean photo negatives and how to clean film negatives safely, step by step. Let’s sum up the essentials:
- Start with dry cleaning (blower, microfiber, or Pec Pad) before attempting wet methods.
- If necessary, use distilled water and very mild wetting agents, followed by gentle isopropyl or specialized film cleaners, mostly only on the non-emulsion side.
- Avoid forceful scrubbing, harsh chemicals, or repeated soakings.
- Stubborn stains or mold should be treated cautiously; in serious cases, consult a professional.
- Once cleaned, store negatives in archival conditions-cool, dry, dark, in proper sleeves and boxes.
- Always digitize or back up images early, as even cleaned negatives can degrade over time.
If you’d prefer to have professionals handle your film, Smooth Photo Scanning offers negative scanning services that include gentle surface cleaning using a lint-free cloth and air dusting. For more intensive cleaning methods, customers may need to prepare their negatives before sending them in. Once received, we carefully digitize your film to ensure the best possible results without risking damage.
Preserve Your Negatives with Smooth Photo Scanning
Cleaning your film negatives is just the first step, as true preservation comes from digitizing them safely.
Smooth Photo Scanning offers photo digitizing service solutions that protect your fragile film while delivering sharp and high-quality digital images.
Our experts use archival-safe methods and advanced equipment to turn negatives into digital files that last a lifetime. Don’t risk losing your history to time. Let Smooth Photo Scanning professionally clean, scan, and preserve your negatives so they can be shared and enjoyed for generations.
Get your quote today at Smooth Photo Scanning and keep your memories alive in stunning digital form.