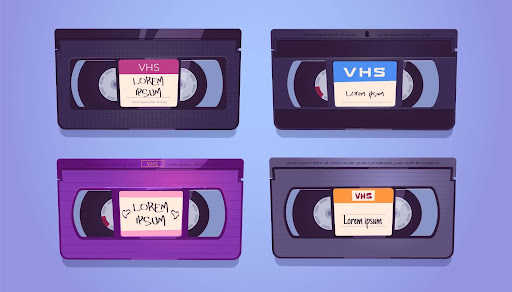
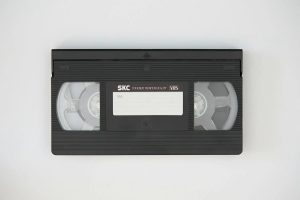
Families often rediscover boxes of aging videotapes of weddings, birthdays, graduations, and everyday moments captured decades ago. Unfortunately, many people underestimate how fragile these memories really are.
Digitizing old videos is a time-sensitive preservation task.
VHS tapes are analog magnetic media. Over time, the magnetic signal weakens, the binder holding the tape degrades, and the playback quality deteriorates. Even tapes that appear playable today may fail without warning during the next playback attempt.
Today, we break down the top eight mistakes people make when they digitise VHS videos, explain why those mistakes are risky, and show how they can be avoided with the right process and expertise.
Key Takeaway:
Once VHS degradation starts, lost video data cannot be recovered, only preserved before it disappears.
Mistake #1: Waiting Too Long to Digitise VHS Videos
VHS tapes rely on iron oxide particles bonded to plastic film. Over time, the binder that holds those particles absorbs moisture and breaks down, a process known as binder hydrolysis. (Source) This causes:
- Signal loss and visual noise
- Audio dropouts
- Sticky or brittle tape that sticks to playback heads
Archival guidance and preservation research note that analog magnetic tape lifetimes vary with storage. Tapes stored under optimal archival conditions may last 10 to 50 years, but in poor conditions, measurable degradation can appear within about 5 to 10 years, which is why early digitization is recommended. (Source)
Why “It Still Plays” Is a Dangerous Assumption
One of the most common mistakes in digitizing old videos is assuming that playback equals safety. In reality, every playback stresses the tape. Often, the final playback attempt is the one that causes permanent damage.
Did You Know?
Many VHS tapes fail during digitization attempts because the tape has already weakened beyond safe playback tolerance.
Mistake #2: Attempting to Fixing a VHS Tape Without Professional Evaluation
When tapes jam or play poorly, many people attempt to fix a VHS tape themselves. Common DIY approaches include:
- Opening cassette shells with household tools
- Manually rewinding loose tape
- Cleaning tape with alcohol or a cloth
These methods often cause irreversible stretching, creasing, or contamination.
What Professional VHS Tape Repair Actually Involves
Properly fixing a VHS tape requires specialized equipment and experience, including:
- Controlled re-spooling to correct tape tension
- Re-casing damaged shells
- Inspection for mold or oxide shedding
Without these safeguards, DIY repairs often destroy footage permanently.
Mistake #3: Relying on Low-End Transferring VHS to DVD Machines
Retail transferring VHS to DVD machines are designed for convenience and not for preservation. Common problems include:
- No time base correction (TBC)
- Video jitter and frame instability
- Audio drifting out of sync
These machines capture unstable signals directly, locking errors permanently into the digital file.
Why Professional Playback Hardware Matters
Professional-grade systems use:
- Real-time playback decks
- Stable tape transport mechanisms
- External TBC filtering to stabilize signal timing
This difference is critical when learning how to digitize VHS correctly.
| Feature |
Consumer Machines |
Professional Transfer |
| Time Base Correction |
No |
Yes |
| Playback Stability |
Low |
High |
| Signal Monitoring |
None |
Full QC review |
Mistake #4: Skipping Tape Inspection and Cleaning Before Digitizing Old Videos
Dust, mold, and debris accumulate on VHS tape over decades. When uncleaned tapes are played:
- Playback heads clog
- Image streaking appears
- Equipment can be damaged
Skipping inspection is one of the fastest ways to ruin digitizing old videos.
Why Inspection Is a Mandatory First Step
Professional workflows inspect every tape for:
- Warped or cracked shells
- Brittle or sticky tape
- Mold contamination
Pro Tip:
A contaminated VHS tape can damage both the tape and the VCR in a single playback.
Mistake #5: Misunderstanding How to Digitize VHS Correctly
Many tutorials oversimplify how to digitize VHS. In reality, proper digitization includes:
- Analog-to-digital signal conversion
- Real-time capture at original resolution
- Audio-video synchronization
VHS is not a digital format. It must be captured carefully and in full, without skipping or acceleration.
Why Real-Time Transfer Is Essential
Real-time capture ensures:
- No dropped frames
- Accurate playback speed
- Correct audio alignment
This is especially important when people attempt to digitise VHS videos using shortcuts or automation tools.
Mistake #6: Choosing the Wrong Output Format When You Digitise VHS Videos
One of the most misunderstood aspects of digitizing old videos is output format. While DVDs were popular in the early 2000s, today:
- MP4 files offer broader compatibility
- Digital files are easier to back up
- DVDs rely on aging optical media
That said, some families still prefer DVDs for playback convenience. People often reduce long-term accessibility by:
- Over-compressing video files
- Using outdated codecs
- Converting files multiple times
| Format |
Longevity |
Flexibility |
Storage Risk |
| MP4 |
High |
Very High |
Low |
| DVD |
Medium |
Low |
Medium |
Mistake #7: Neglecting Long-Term Storage After Digitizing Old Videos
After digitizing old videos, many people store files on a single USB drive. This is risky. Experts recommend:
- At least three copies
- Stored on two different media
- One off-site or cloud-based copy
Pro Tip:
The 3-2-1 backup rule dramatically reduces the risk of data loss.
Mistake #8: Choosing Inexperienced Providers to Convert VHS to Digital
Not all services follow archival-safe practices. Warning signs include:
- Only VHS to DVD, no digital file output
- No inspection process
- Automated batch transfers
A trustworthy service should provide:
- Real-time capture using professional decks
- Individual tape inspection and handling
- Quality control review after capture
Choosing experience matters as much as equipment when you need to convert VHS to digital.
Closing Thoughts
Every mistake outlined above puts irreplaceable memories at risk. From waiting too long to using unreliable VHS to DVD converter machines, these errors often result in permanent loss.
Smooth Photo Scanning was built to prevent exactly these outcomes. Our professional workflow addresses each mistake directly:
- Every tape is inspected and cleaned before transfer.
- Transfers are done in real time using professional video decks.
- Time base correction stabilizes playback and reduces jitter.
- Files are captured at original resolution with no quality loss.
- Each video is reviewed, trimmed, and custom-named.
SPS focuses on preservation, regardless of whether you’re looking to convert VHS to digital for long-term storage or need help to fix a VHS tape.
For families serious about protecting their history, working with an experienced photo digitizing service like Smooth Photo Scanning ensures your memories are digitized correctly the first time before time erases them forever.